The first thing you have to do after installing IntelliJ IDEA is configure a JDK.
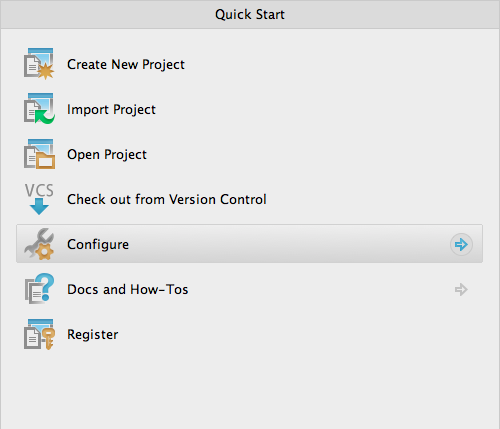
To see the list of preconfigured JDKs click the Configure button in the Quick Start panel of the Welcome screen.
The window contents slide across.
Now choose Project Defaults
And finally Project Structure
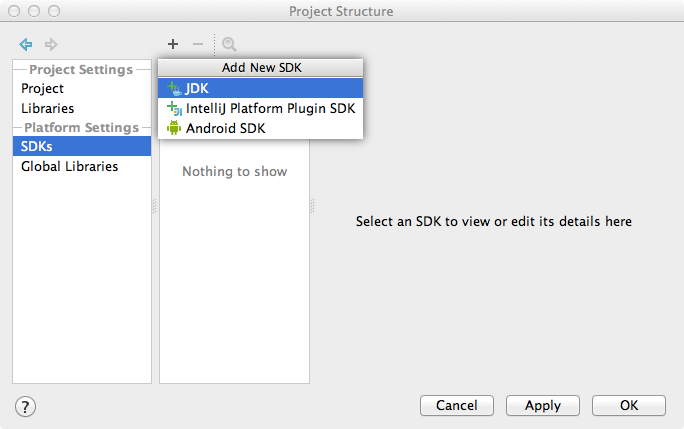
In the Project Structure dialog switch to the SDKs section. Here you can add a JDK by clicking the plus button:
Make sure you have configured at least one JDK before you import the project.
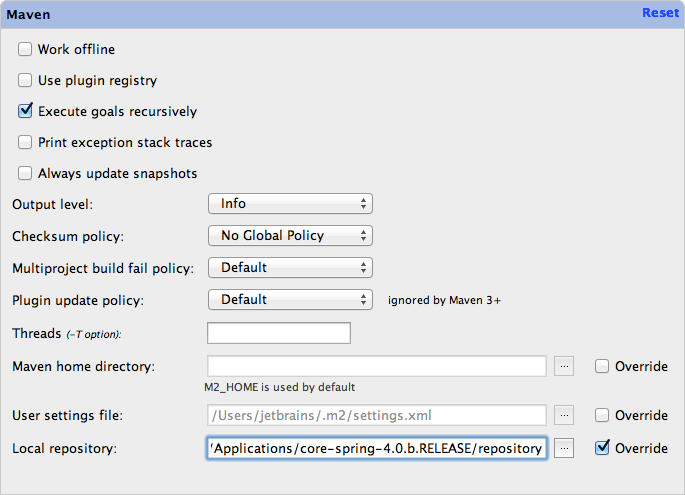
Before you import the project, be sure to specify the Maven repository found within the courseware installation folder or directory. To do that, click the Configure button on the Welcome screen, and then choose Settings (or Preferences for MacOS).
In the Settings dialog:
Switch to the Maven tab;
Select the Override checkbox next to the Local repository setting; and
Specify the path to the Maven repository folder, a sub-folder of the course installation folder.
The default course installation folder is:
MS Windows: C:\<course-name>
MacOS: /Applications/<course-name>
Linux: /home/<user-name>/<course-name>
This example shows core-spring-4.0.b.RELEASE on MacOS. The
full path is:
/Application/core-spring-4.0.b.RELEASE/repository
Here are some more examples for different courses and releases:
MS Windows: C:\spring-web-4.0.a.RELEASE\repository
MacOS: /Applications/enterprise-spring-4.0.a/repository
Linux: ~/core-spring-4.0.b.RELEASE/repository
Remember this location if you are asked to configure M2_REPO later.
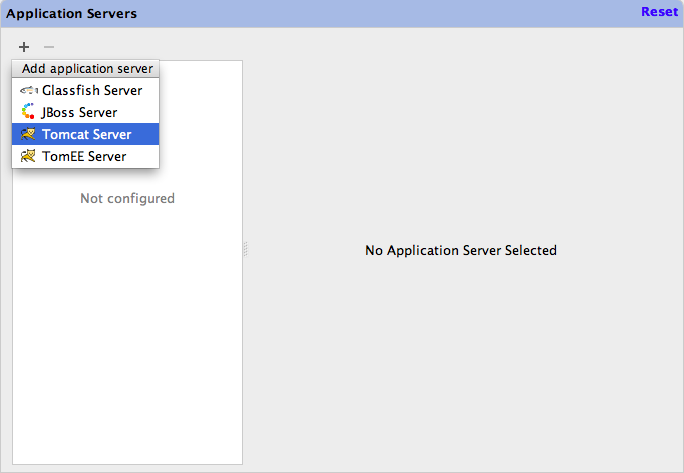
As you will need to run web applications during the course, make sure you’ve configured a Tomcat application server. To see the list of configured application servers, return to the Settings/Preferences dialog and switch to the Application Servers tab. Click the plus button to add an application server:
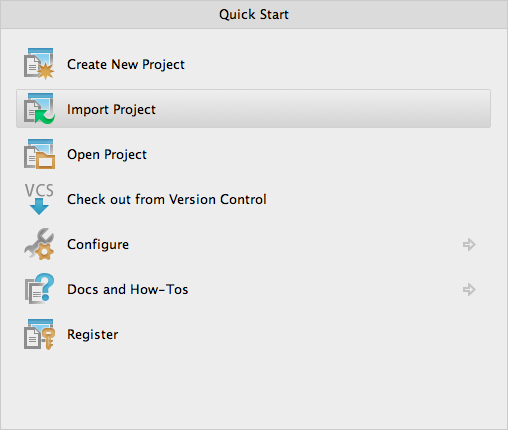
To import a project into IntelliJ IDEA click the Import project button on the Welcome screen:
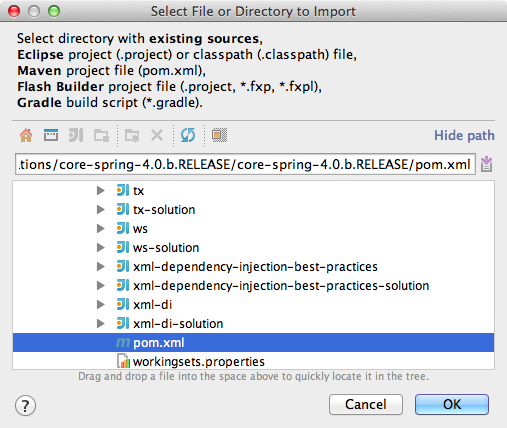
When the project you’re trying to import has a root pom.xml file (which means this is a Maven project), then you have to choose this pom.xml file in the dialog that appears after you’ve clicked the Import project button.
Our courses contain many sub-projects, each with their own pom.xml. Make sure to pick the parent POM, located in the folder that holds all the projects as shown. The parent folder is:
MS Windows: C:\<course-name>\<course-name>
MacOS: /Applications/<course-name>/<course-name>
Linux: /home/<user-name>/<course-name>/<course-name>
The example below shows The example below shows the location of
the parent POM for core-spring-4.0.b.RELEASE on MacOS. Its
full path is:
/Application/core-spring-4.0.b.RELEASE/core-spring-4.0.b.RELEASE/pom.xml
On MS Windows the same file would be at:
c:\core-spring-4.0.b.RELEASE\core-spring-4.0.b.RELEASE\pom.xml
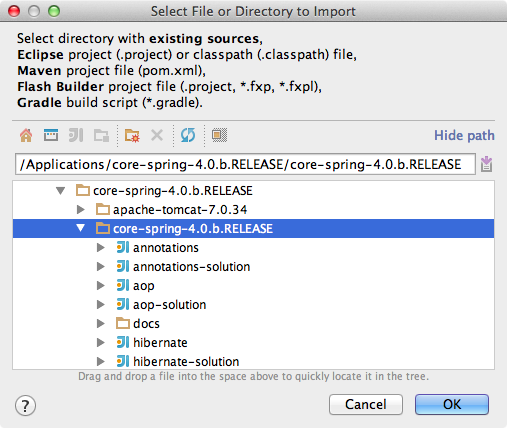
When the project comes with no root pom.xml file you can import it as an Eclipse project using its .classpath file. In our case there is more than one project, so choose the entire root folder:
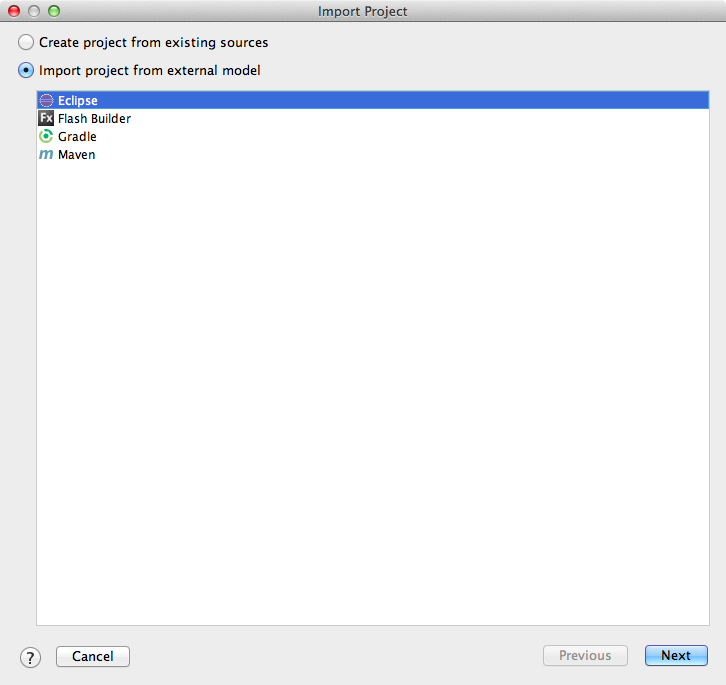
After you’ve chosen the folder, the IDE will ask you which external model to use for the import. Make sure you’ve selected Eclipse:
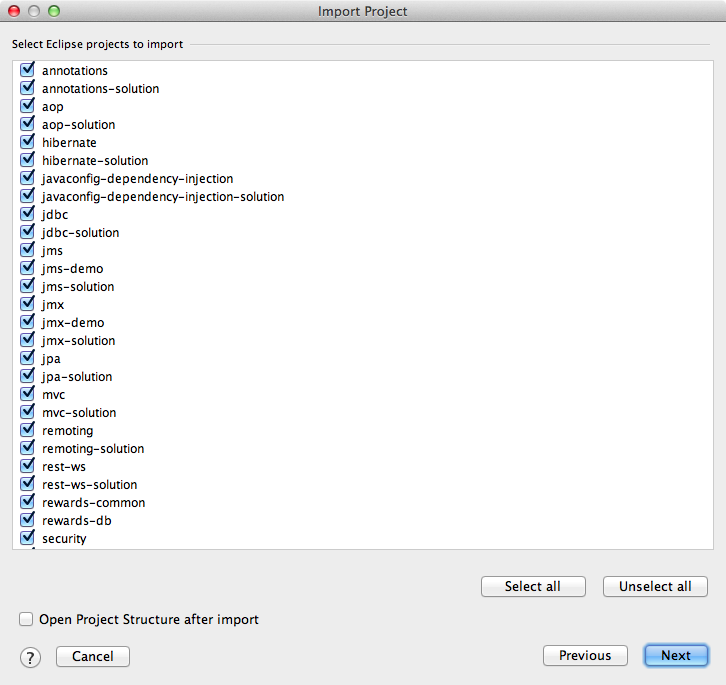
If there are several projects in the folder, the IDE will ask you to select the projects to import:
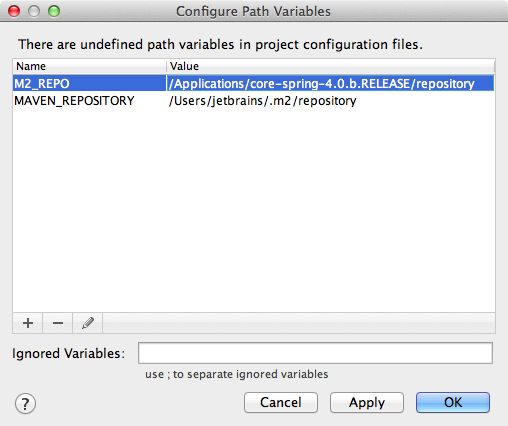
At this point IntelliJ IDEA may prompt you to set the M2_REPO variable. Set this variable to point to the 'repository' folder within the install folder (the same location that we configured earlier). Once set, you should now see all of the Eclipse projects as modules within IntelliJ.
Finally, after the IDE has imported the project, make sure it is compiled without errors. Once the import is finished the IDE may ask you to restart the IDE, please do it.
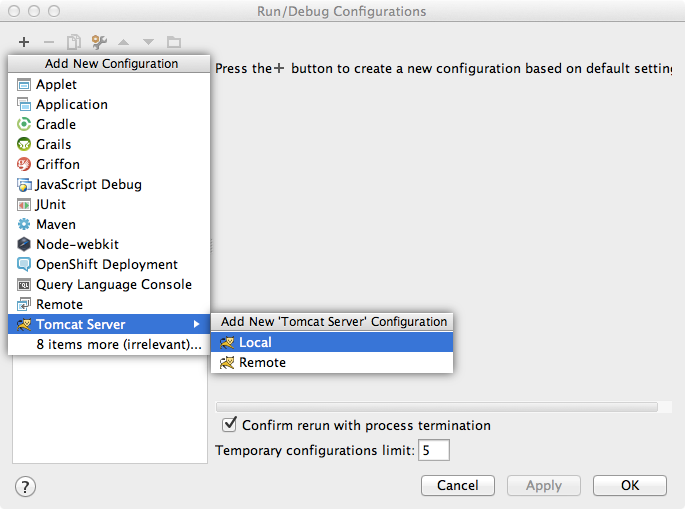
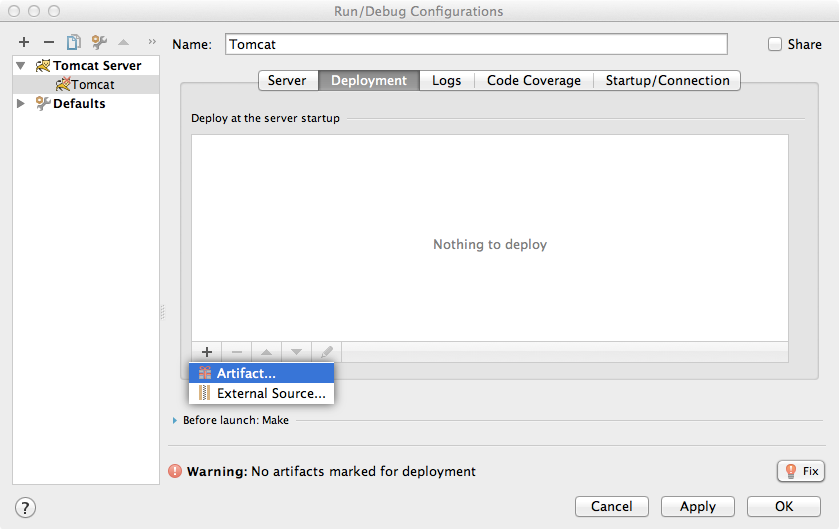
To run a web application, deploy the corresponding artifact to the application server. A Run configuration defines how artifacts are deployed to a server. Go to the Run → Edit Configurations menu, and add a Local Tomcat configuration. The Local run configuration will start a new instance of the configured server and deploy artifacts there.
Then switch to the Deployment tab and add the artifacts by clicking the plus button:
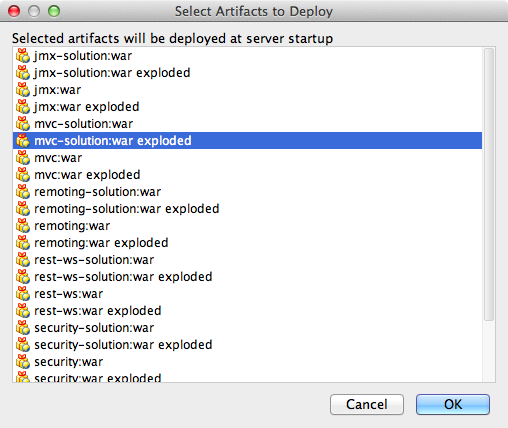
Select the artifacts you’d like to deploy to the server:
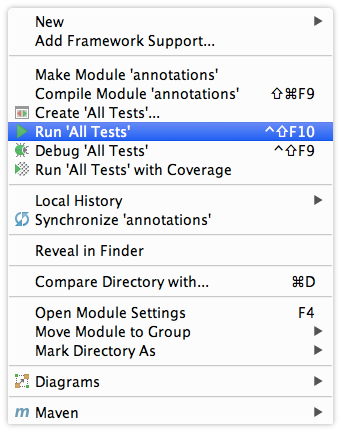
To run all tests from a package or the entire project, simply select Run ‘All Tests’ from the context menu in the Project tool window:
If you want to run tests from a single class, use the corresponding action from the context menu for that particular class. To use specific parameters for running tests, you can create a run configuration manually via the Run → Edit Configurations menu.
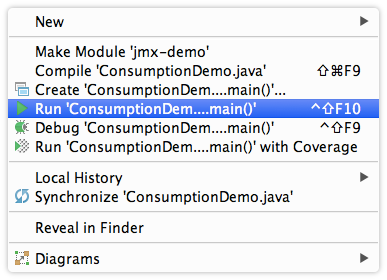
To run an application from its main method, use the corresponding context menu action:
Or create a run configuration manually via the Run → Edit Configurations menu.
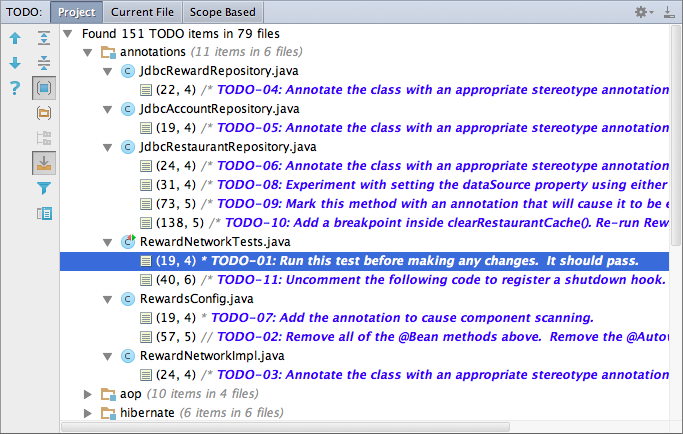
To see the list of TODO instructions, use the TODO tool window, which can be opened from the left-hand bottom corner of the IDE. Use the toolbar buttons to group items by module:
Refer to the following resources to learn more about IntelliJ IDEA: