Chapter 19. spring-microservices (optional): Microservices with Spring

19.1. Introduction

This lab refactors the MVC application to use a microservice.

What you will learn:

  1. How to deploy a Eureka service-discovery server <ok>
  2. How to write a microservice with a RESTful interface
  3. How to access a microservice and interact with it.

Specific subjects you will gain experience with:

  1. Spring Cloud projects
  2. Eureka discovery-server
  3. Using @DiscoveryClient
  4. Spring Clouds enhanced RestTemplate

Estimated time to complete: 45 minutes

19.1.1. Overview

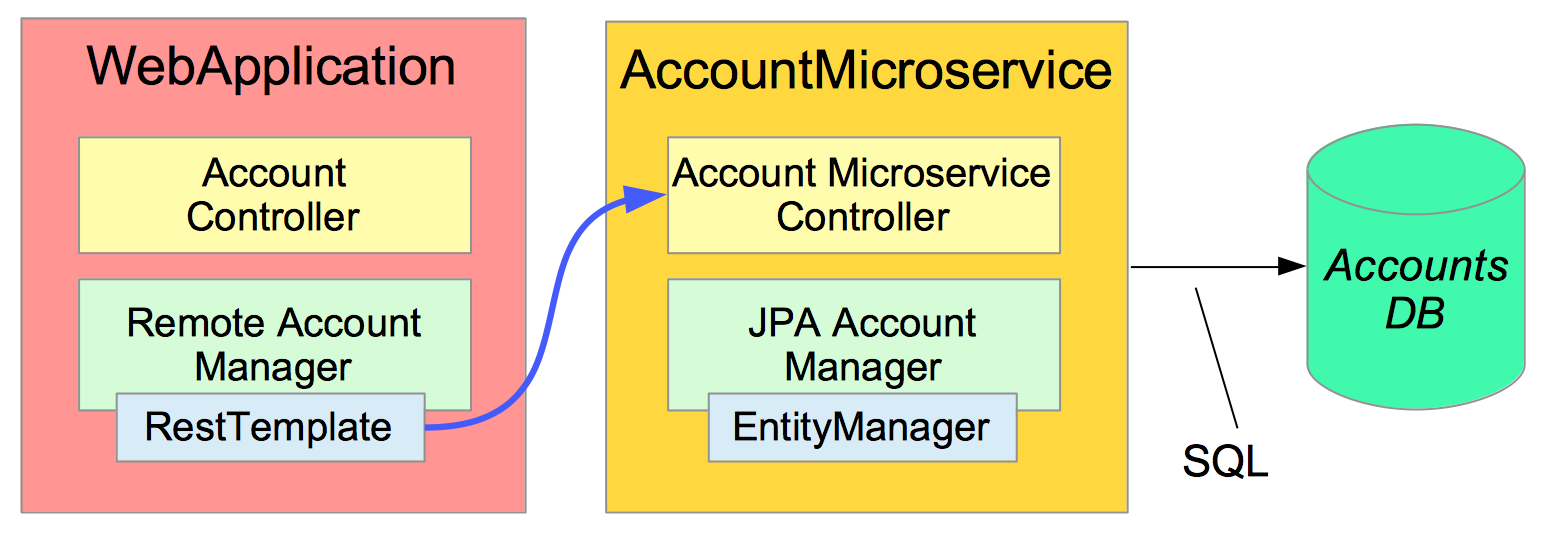
The original application was a simple, single process "monolith". It managed its own accounts database and fetched data directly.

We are going to refactor it into two processes:

Component Model

Figure 19.1. Component Model


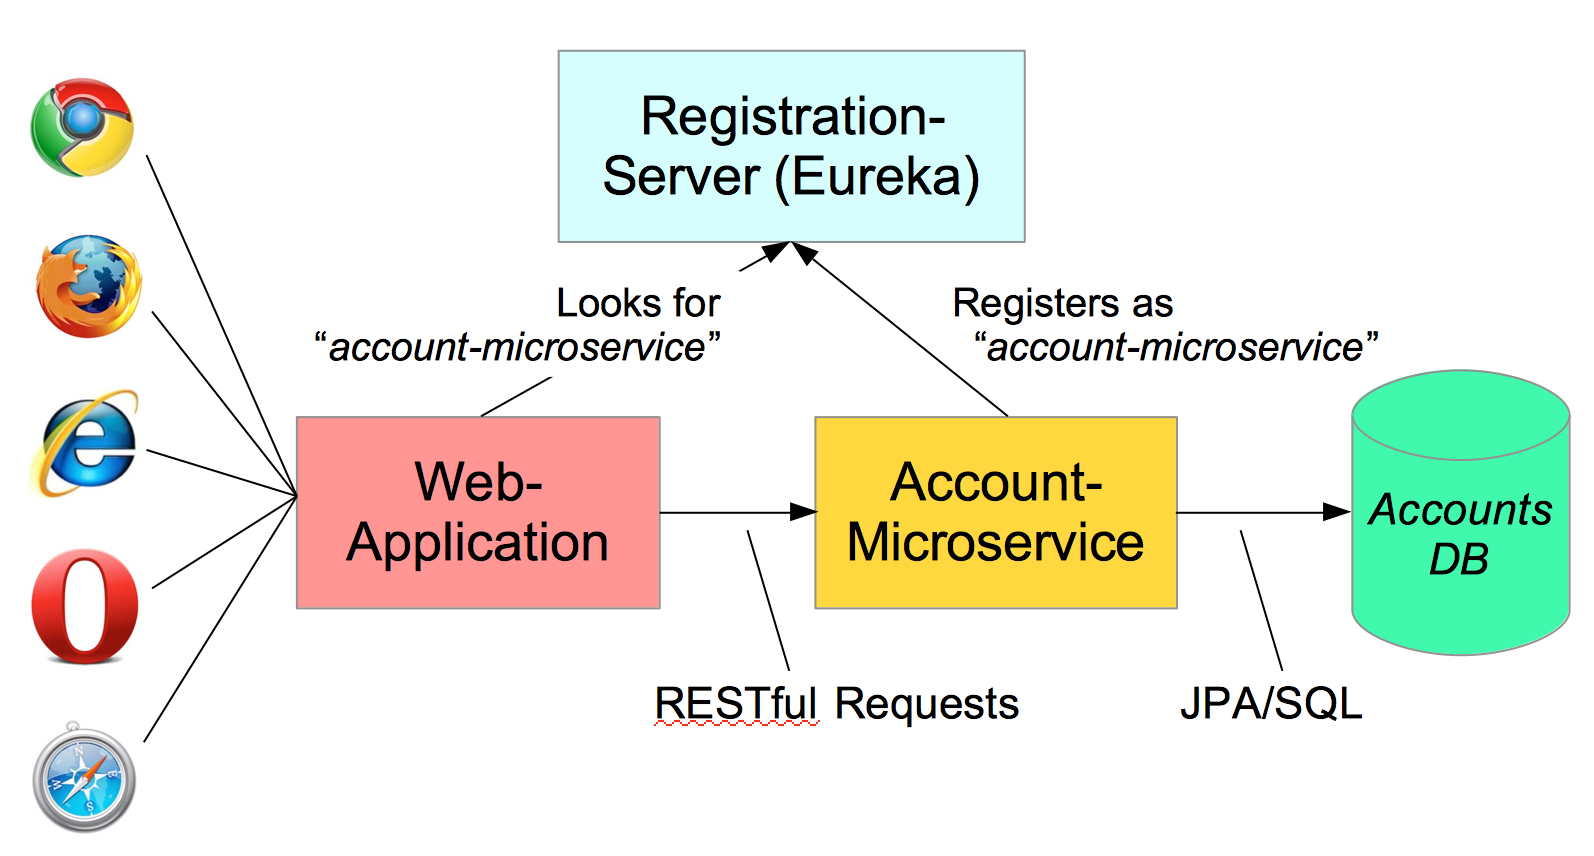
The full system also requires a discovery-server, making three processes in all:

System Architecture

Figure 19.2. System Architecture


19.1.2. Notes

Since you will be running (eventually) 3 applications at the same time:

  1. You will need to switch between console output (use the Display Selected Console icon on the right-hand side of the Console view.
  2. Output to the console will keep taking the focus from the Task window. To avoid this, drag the Console view so it sits in its own pane. Ask your instructor if you don’t know how to do this.
Console View

Figure 19.3. Console View


19.2. Instructions

19.2.1. Discovery Server

  1. Go to the ms-discovery-server project.
  2. Write the Discovery Server. RegistrationServer.java is the only file you need. Follow TODOs 01-02 to make it into a Eureka Discovery Server
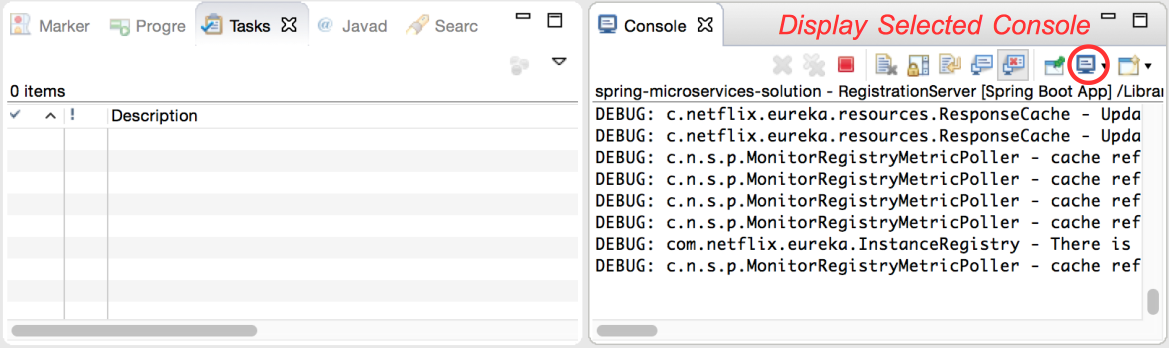
 running as a Spring Boot application.
  3. TODO-03: Run the RegistrationServer as a Spring Boot app and go to http://localhost:1111 to view its Dashboard.
  4. TODO-04: Quiz: where is the port 1111 configured?
  5. TODO-05: Leave the registration-server running and move on to the next project.

19.2.2. Accounts Microservice

  1. Open the ms-accounts-server project.
  2. TODO-06: Setup the AccountsMicroservice.java to be a Spring Boot application that registers itself with the Registration Server.
  3. TODO-07: Run the AccountsMicroservice as a Spring Boot application and go to its home-page: http://localhost:/NNNN - you will need to work out the port number it is listening to (how? - similar to TODO-05). You should be able to fetch an account list as JSON by clicking the link.
  4. TODO-08: Go back to the Registration Server dashboard http://localhost:1111. Has this microservice registered yet (you may need to wait a minute or so and refresh the screen a few times).
  5. TODO-09: Leave accounts-microservice running and move on to the last project.

19.2.3. Accounts Web Application

  1. Open the ms-web-client project.
  2. TODOs 09-12: Setup AccountsWebApplication.java as a micro-service client. Note that TODO-12 is for information, there is nothing to do.
  3. TODOs 13-15: Setup RemoteAccountManager to access the Accounts microservice using RESTful requests - you will need a load-balanced RestTemplate to do the work.
  4. TODO-16: Return to AccountsWebApplication.java and run it as a Spring Boot application. Once it is up and running properly it will also appear in the Registration Server dashboard - this may take a minute or so.
  5. TODO-16: Goto http://localhost:8080 and see if you can list and view accounts.

Notice that setting up all three processes is a lot more complicated than running our original MVC application. But each process is actually very simple.

Congratulations, you have finished the lab.