In this lab you will implement basic Spring MVC Controllers to invoke application functionality and display results to the user. This lab assumes you are not using Spring Boot, for example because you are responsible for maintaining existing applications.
What you will learn:
Specific subjects you will gain experience with:
DispatcherServletInternalResourceViewResolverEstimated time to complete: 30 minutes
There should be a Servers folder in STS on the left hand side and it should be open. It should contain a Tomcat server ready to run.
If there is no such folder, or it is empty, you will need to setup a new server. For assistance see Appendix H, Using Web Tools Platform (WTP) for details.
Quick instructions for this exercise have been embedded within
the lab materials in the form of TODO comments. To display them,
open the Tasks view (Window >> Show View >>
Tasks (not Task
List)).
The instructions for this lab are organized into two main sections. In the first section you will be briefed on the web application functionality you will implement in this lab, then you will review the pre-requisite infrastructure needed to develop with Spring MVC. In the remaining sections you will actually implement the required web application functionality.
Spring MVC is a comprehensive web application development framework. Let’s see how we have used it to implement the current system.
The web application we are developing should allow users to see a list of all accounts in the system, then view details about a particular account. This desired functionality is shown below:
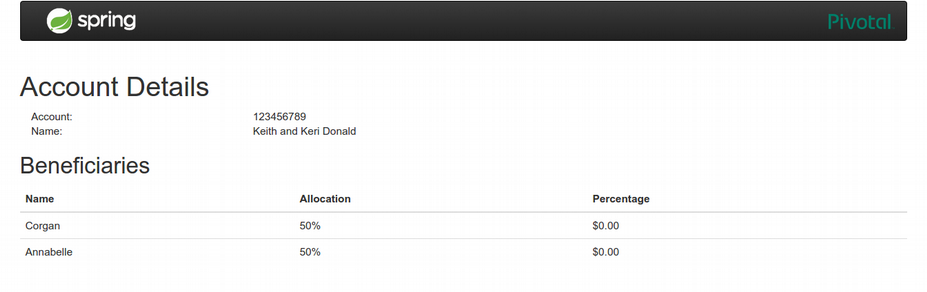
You should see a listing of all accounts by name with links to view details. Once implemented, clicking on a link will take you to the account details page as shown below (however this is not yet implemented).
In this first step you will assess the initial state of the web application.
(TODO-01) Begin by deploying the web application this project as-is (see Appendix H, Using Web Tools Platform (WTP) for how to run).
Once deployed, navigate to the index page at http://localhost:8080/mvc. You should see the
index page display. Now click the View
Account List link. You should see a list of accounts display
successfully. This 'accountList' functionality has been
pre-implemented for you. We will review and change some of that in
a moment, but it at least gets you started with the
application.
![[Note]](images/note.png) |
Note |
|---|---|
|
If your application deploys successfully there should be a lot
of logging output in the console window and the images on the page
should appear correctly. If you have problems, try the following
before asking for help. Stop the server. Right-click on the server
in the |
Now try clicking on one of the account links. You will get a 404 indicating there is no handler for this request because the 'accountDetails' functionality has not yet been implemented.
Quickly assess the initial configuration of the "backend" of
this web application. To do this, open WebInitializer in the config package. Notice that the root configuration has already been defined
to bootstrap your application-layer from RootConfig class. Open this file to see the
beans that make up this layer. You will see that it simply imports
other configurations and establishes transaction management, all
with just a few annotations.
The accountManager is the key
service that can load accounts from the database for display. The
web layer, which will be hosted by the Spring MVC
DispatcherServlet, will call into this service to handle user
requests for account information.
With an understanding of the application-layer configuration, move on to the next step to review the web-layer configuration.
The central infrastructure element of Spring MVC is the DispatcherServlet. This servlet’s job
is to dispatch HTTP requests made to the web application to
handlers you define. As a convenience, this lab has already
deployed a DispatcherServlet for you with a basic boilerplate
configuration. In this step, you will review this configuration and
see how the existing functionality of the web application is
implemented.
Return to WebInitializer and notice
MvcConfig is listed as the servlet
config class. Also notice that a /accounts/* path is mapped to it.
Now open the MvcConfig
configuration class and review it. First, notice how component
scanning is used to detect all controllers within a specific
package. This keeps us from having to define individual bean
declarations for each controller, which can be great when we have
dozens or hundreds of controllers. Other than this, the
configuration is largely empty.
Next, review the Java implementation of the AccountController to see how it works.
Notice how the @RequestMapping
annotation ties the /accountList URL
to the accountList() method and how
this method delegates to the AccountManager to load a list of
Accounts. This list is added to the model for display to the user.
Finally it requests the accountList.jsp view to render the list by
returning its location as a String
telling the DispatcherServlet to use this view to render the
model.
|
Note |
|---|---|
|
Notice that the view name is specified as the full path relative to the Servlet’s context root. The default ViewResolver simply forwards to the resource at that location. We fix that next. |
Lets quickly summarize the big picture. Return to your web
browser, and click on the "View Account List" link again. You
should see the account list display again successfully. Clicking on
that link issued a GET request to http://localhost:8080/mvc/accounts/accountList
which set the following steps in motion:
accountList() method on the AccountController based on the
@RequestMapping annotation.At this point you should have a good feel for how everything works so far. You should also have an idea of how to add the remaining "accountDetails" functionality to this application. You simply need to define a new method encapsulating this functionality, test it, and map it to the appropriate URL. You’ll do that soon.
But first let’s get rid of those absolute paths to views.
The view name in our handler method uses an absolute path. this means the method is aware of the specific type of view that will be rendered (JSPs in this case). Spring recommends decoupling request handling from response rendering details. In this step, you will add a ViewResolver to provide a level of indirection.
(TODO-02) Navigate to the MvcConfig
class and add a bean definition of type InternalResourceViewResolver. This will
override the default ViewResolver and enable the use of logical
view names within the Controller code. You should now specify two
properties on the view resolver bean definition: prefix and suffix. Review the current view names to
determine these values.
![[Tip]](images/tip.png) |
Tip |
|---|---|
|
The |
Now refactor the existing controller (TODO-03) and test
(TODO-04) so that only a simple view name such as accountList is used. The AccountControllerTests should now pass.
Now (TODO-05) restart the web application. If you are still able to view the list of accounts, your changes are correct.
Now you will implement the handler method that supports the functionality for the missing account details page. Once you have completed this section, you will no longer get a 404 when you click on an account link from the account list view. Instead, you will see the details of that account.
(TODO-06) In the AccountController,
add a method to handle requests for account details. The method
should use the account identifier passed with the HTTP request to
load the account, add it to the model, and then select a view. What
name (key) will you use for the account attribute when you add it
to the model?
|
Tip |
|---|---|
|
In your web browser, try clicking on an account and look at the URL to see which parameter name is used to pass in the account identifier. Ignore the 404 error. The JSP has already been implemented for you. Review it in the
|
We’re almost done! There are two things we still have to do. First of all, we have to test the controller.
(TODO-07) Open AccountControllerTests and review how the
accountList() method has been tested. As you can see, it just calls
the handler method (without having to worry about doing any web
setup) and inspects if the model has been correctly filled. In this
step, we will do the same for the accountDetails() method.
Implement a method called testHandleDetailsRequest() to test the controller - in a similar way to testHandleListRequest(). There should be one attribute in the model. What is its name? What type is it? Get the attribute and confirm it contains the right data. Don’t forget to annotate the new method with @Test.
|
Note |
|---|---|
|
The ability to test Spring MVC Controllers out-of-the-container is a useful feature. Strive to create a test for each controller in your application. You’ll find it proves more productive to test your controller logic using automated unit tests, than to rely solely on manual testing within your web browser. |
When all tests pass, carry on.
Finally (TODO-08) try to run the web application again and make sure the functionality you implemented works. If it doesn’t, try to find where you might have gone wrong and possibly talk to your instructor.
If there is time left, you can try this optional section.
Spring’s Mock MVC testing framework allows a JUnit test to
drive Spring MVC as if it was running in a container - enabling
more powerful testing that the simple AccountControllerTests you have been
using.
Open the class MockMvcTests and
follow the TODO steps. Most of the code has been written for you.
The important part is to see if you understand how the tests work -
we did not cover Mock MVC testing in the course notes.
For more information, refer to the Online Documentation