In this lab you will gain experience with Spring Security.
What you will learn:
Specific subjects you will gain experience with:
Estimated time to complete: 45 minutes
![[Note]](images/note.png) |
Note |
|---|---|
|
This project uses Spring Boot’s "devtools" to enable auto-restart whenever a source file is modified. |
Quick instructions for this exercise have been embedded within
the lab materials in the form of TODO comments. To display them,
open the Tasks view (Window >> Show View >>
Tasks (not Task
List)).
Occasionally, TODO’S defined within XML files may fail to
appear in the Tasks view (i.e. gaps in
the number sequence). To correct this, go to Preferences >> General >> Editors
>> Structured Text Editor >> Task Tags
pane. Check Enable searching for Task
Tags and click Clean and Redetect
Tasks. On the Filters tab,
ensure XML content type is checked.
The instructions for this lab are organized into five sections. In the first section, you’ll use Spring Security to protect part of the web application. In the second section, you will manage login and "access denied" scenarios. In the third section, you will handle unsuccessful attempts to log in. In the fourth section, you will configure some additional users and roles and experiment with different role-based access rules. In the final section, you will use the security tag library to display links and data based on role.
Currently, the Reward Network web application allows any user to not only view Account information, but also to edit Account information. Of course, in a typical application, certain roles would most likely be required for those actions. The first step in enforcing such role-based access is to intercept the requests corresponding to those actions. Spring Security utilizes standard Servlet Filters to make that possible.
(TODO-01) Begin by starting the application for this project and navigate to the home page at http://localhost:8080/. This is a Spring Boot application so run by doing right click Run As >> Spring Boot App. You should see a link to 'View Account List' - click on this link and the list of accounts should appear. Be sure the application starts successfully before moving on to the next step. You may need to stop any application that could be already running. If the application will not run, ask your instructor now for help.
(TODO-02) Remove the statement as indicated in the TODO. Spring Boot will automatically enable Spring Security for us. We explicitly disabled the Spring Security auto-configuration in the first TODO, that’s why we managed to access the application in the first place. If we use Spring Boot auto-configuration, it will detect Spring Security on the classpath and protect the whole application. As soon as we’ll set up our own security configuration, it will override Spring Boot’s default auto-configuration.
(TODO-03) Next, import the bean configuration class containing
the security configuration into the SecurityApplication class. (The name of the
class is SecurityConfig and is located
in the config package). This will include those beans when
bootstrapping the application context.
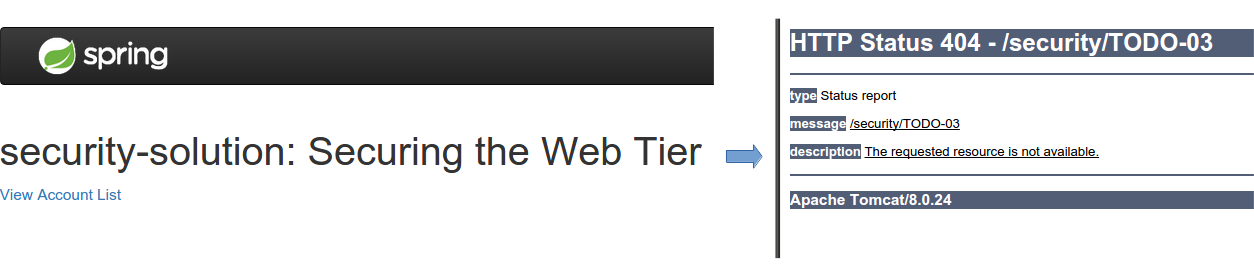
At this point, Spring Security should be fully enabled and ready to intercept incoming requests. Save all work, let the application restart. Navigate to the home page at http://localhost:8080/. You should see a link to 'View Account List' - click on this link. If your filter is configured correctly, then you should get a 404 response.
This happens because the resource mapped to /accounts/accountList.htm is secured and you
have not configured a real login page yet. The SecurityConfig class currently specifies
loginPage("/TODO-04") and there is no
such page as TODO-04.
In this section you’ll use Java Configuration to configure a login form for our application.
(TODO-04) Open the SecurityConfig
class. Notice that the actual security constraints are defined
inside the method configure(HttpSecurity http). In particular
notice that the EDITOR role
is required to access the accountList
page.
When we tried to access the restricted accountList page the application tried to
redirect us to a login page. Time to configure one.
Back inside SecurityConfig,
configure the login page to be /login
by modifying the loginPage() method
under the formLogin() method.
|
Note |
|---|---|
|
The login page |
At the same time, setup the access denied page so it uses '/denied'.
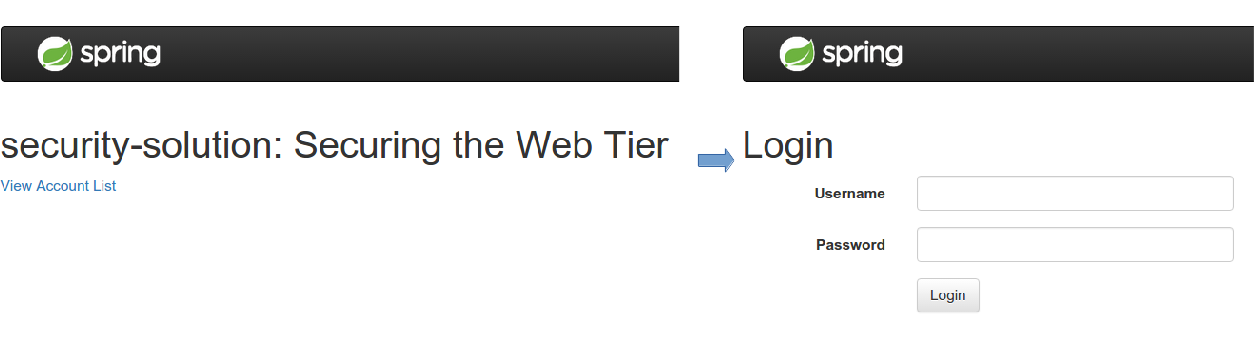
Save all work and, once the application restarts, navigate to the home page at http://localhost:8080/. This time when you click the 'View Account List' it should redirect you to the login form.
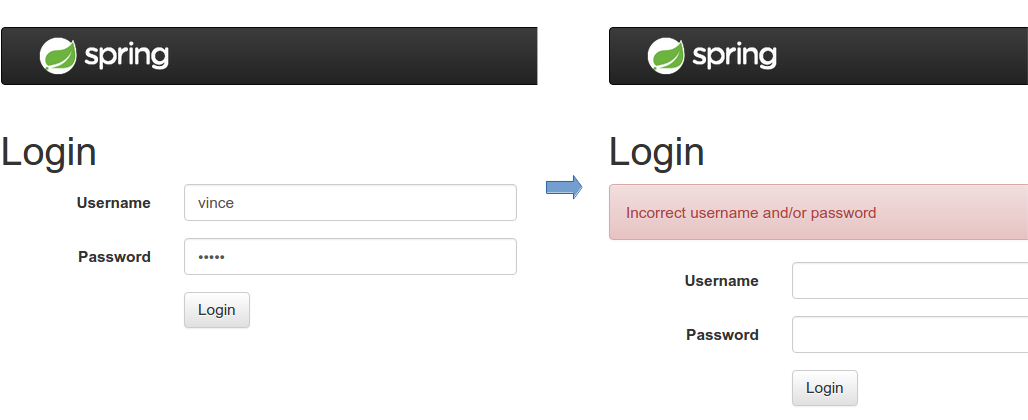
Try logging in with a random username and password such as
username "foo" and password "foo". You should be returned to the
login page with an error message in red. Notice the URL at the top
of the page http://localhost:8080/login?error . By
default a failed login redirects back to the login URL with the
error parameter defined. (You can
customize this by specifying formLogin().failureUrl("/some-url")).
Open login.html under the src/main/resources/templates/ folder. The
<div> delimited by {{#springMacroRequestContext.request.parameterMap.error}}
will be output if the error parameter is non null.
![[Tip]](images/tip.png) |
Tip |
|---|---|
|
Spring’s RequestContext object contains lots of useful information about the current Web setup such as the current request, locale, URL … In this case, |
Notice that the default input field names are username and password and that the form action is to POST
the form to itself.
(TODO-05) To determine a valid username/password combination,
you can explore the authentication configuration (further down
within SecurityConfig you will find
the configureGlobal() method). An
in-memory authentication provider is being used. Notice that a
single hard-coded user, password, and role have been setup to
support testing.
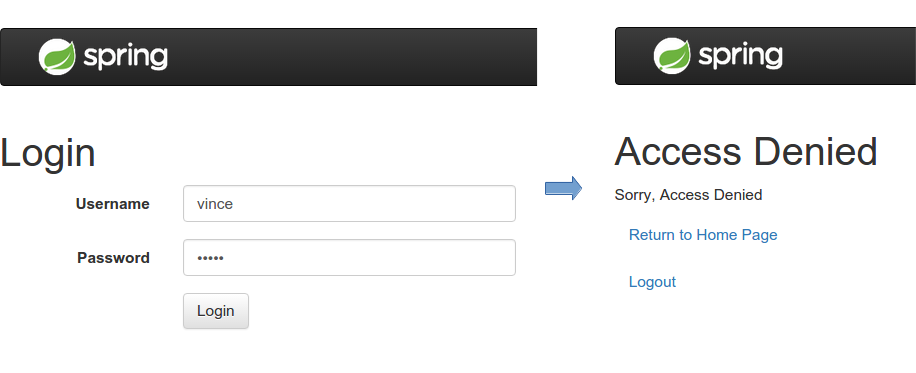
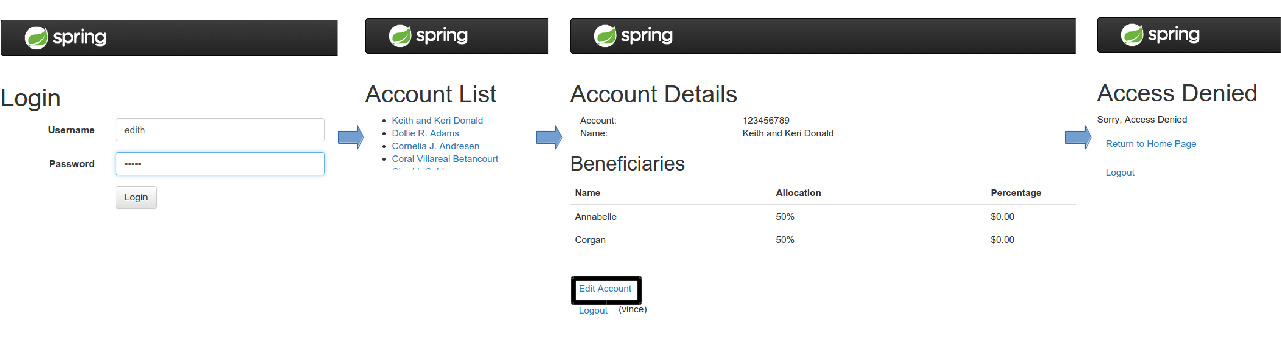
Try logging in using the user called vince. You should see the "Access Denied"
page.
(TODO 06) At the end of the previous section, vince could login, but was denied access to the list of accounts. In this section, you will modify the access rules and define additional users.
So far you have only been logging in as a user with the VIEWER role, and you have been denied access to the account list. Perhaps the restriction is too severe. To edit an account should require the EDITOR role, but accessing the accountList and accountDetails views should be available to a user with the VIEWER role.
Find the authorizeRequests method
and modify the rules for /accounts/account* to enable access for
viewers as well.
Save all work and let the application restart. Using the user
vince, you should now be able to
access the account list and the account details. On the Account
details page, click on 'Edit Account'. This link should send you to
the 'Access Denied' page as vince does
not have the EDITOR privileges.
(TODO 07) Currently you secure URLs starting with /accounts/edit and accounts/account To get a more robust
configuration, you should also enforce that people must at least be
logged in to show anything else starting with /accounts/.
Log out by clicking on the 'log out' link. Then try to access "the Hidden Page" (http://localhost:8080/accounts/hidden). As you can see, this URL is currently not protected, but it should be.
Inside SecurityConfig class, add
another mvcMatchers element at the
bottom of the list with the pattern /accounts/** which enforces that the user
should be fully authenticated. Be sure to do this using the method
that will permit all users to access. Where should you place this
to make sure that the more specific entries will be evaluated
first.
Once the application restarts, check that attempts to access "the Hidden Page" (http://localhost:8080/accounts/hidden) result in the login page being displayed.
(TODO 08) Notice that the account list page provides a logout link. Open accountList.html within /src/main/resources/templates to see how it
is implemented; by default Spring Security looks for a POST /logout
request, which is implemented using Spring MVC form tag.
At this point, logging out doesn’t help much since you
only have one user defined. However, by adding a new user with the
EDITOR role, you should be able to
login as that user and successfully edit the account.
Revisit the globalSecurity method and add a user called edith with the EDITOR role. To do this, you
will need to add an “and()” method on the end of the
line that defines vince, then add
edith on the following line. The new
definition will be similar to that for vince except Edith’s role must be
EDITOR.
|
Note |
|---|---|
|
Spring Security provides many out-of-the-box options for where and/or how the user details are stored. For development and testing, it is convenient to use the in-memory option. Since there is a layer of abstraction here, and since the authentication and authorization processes are completely decoupled, the strategy can be modified for other environments without impacting the rest of the behavior. |
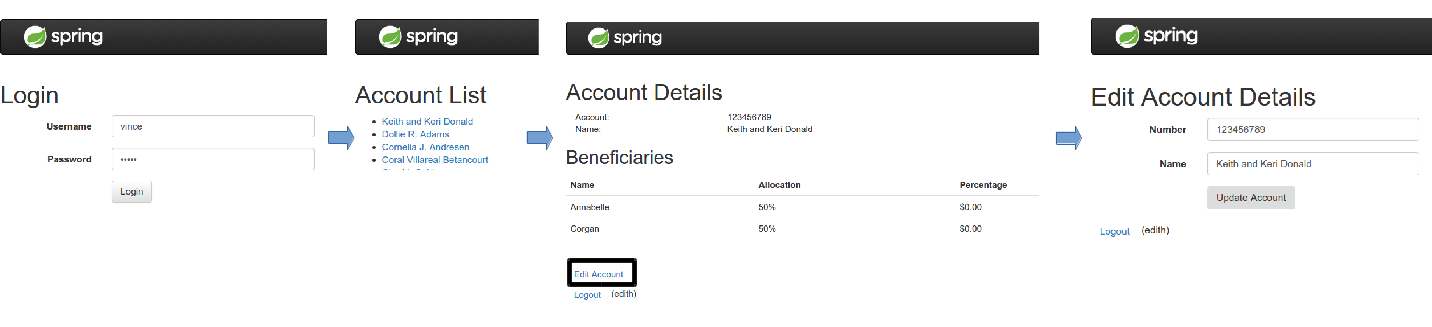
Save all work and, after the application restarts, log in with
the user edith. Navigate to the edit
page by selecting an account from the account list and using the
"Edit account" link on the details page. This time you should be
able to access the editAccount
page.
Our goal is to allow those with EDITOR role to edit account details while
disallowing other roles, so we need to ensure that other users
cannot access this page.
Logout of the application and login again as vince. Repeat the
navigation, but this time we expect vince to be redirected to the
"Access Denied" page.
Even though your application’s security has dramatically improved, you still have plain-text passwords. This point will be improved using SHA-256 encoding.
(TODO-09) Open SecurityConfig file
and setup sha-256 encoding. Embed a method call to .passwordEncoder(new
StandardPasswordEncoder()) in the chain before the users are
defined. Now, passwords need to be encoded, note the encrypted
values are already provided for you in the comment. Change the
plain-text passwords into sha-256-encoded ones. You will not need
to setup any salt source.
Save all work and, after the application restarts, try logging in again. It should work in the same way as before. Your application is now using password encoding.
Note that the encoded password is based on SHA-256 with a random salt value introduced by the StandardPasswordEncoder, and actually includes the generated salt value in the first few bytes (8) of the encoded value. Although SHA-256 encoders are available in various websites, the easiest way to generate passwords loaded with this salt is to use (new StandardPasswordEncoder()).encode("thePassword")
If you see the behavior as described, then you have completed this lab. Congratulations!
|
Tip |
|---|---|
|
Normally there is no way to get back the password from a sha-256 hash, at least not with mathematics, but in the Internet you will find so called Rainbow Tables which are lookup tables for pre-generated hash/plaintext values. Sometimes you can even enter the hash value in google and get back the plaintext. By appending a salt to the user password before the hash is calculated this attack is more difficult, often infeasible. In real life we would recommend to append a salt to the user password. |